4 Chaos Experiments to Start With

Gremlin is a simple, safe and secure service for performing Chaos Engineering experiments through a SaaS-based platform.
Before you begin this tutorial, you’ll need the following:
This tutorial will show you how to use Gremlin’s API
First, ssh into your host and add the gremlin repo:
1ssh username@your_server_ip
1echo "deb https://deb.gremlin.com/ release non-free" | sudo tee /etc/apt/sources.list.d/gremlin.list
Import the GPG key:
1sudo apt-key adv --keyserver keyserver.ubuntu.com --recv-keys C81FC2F43A48B25808F9583BDFF170F324D41134 9CDB294B29A5B1E2E00C24C022E8EF3461A50EF6
Install the Gremlin client and daemon:
1sudo apt-get update && sudo apt-get install -y gremlin gremlind
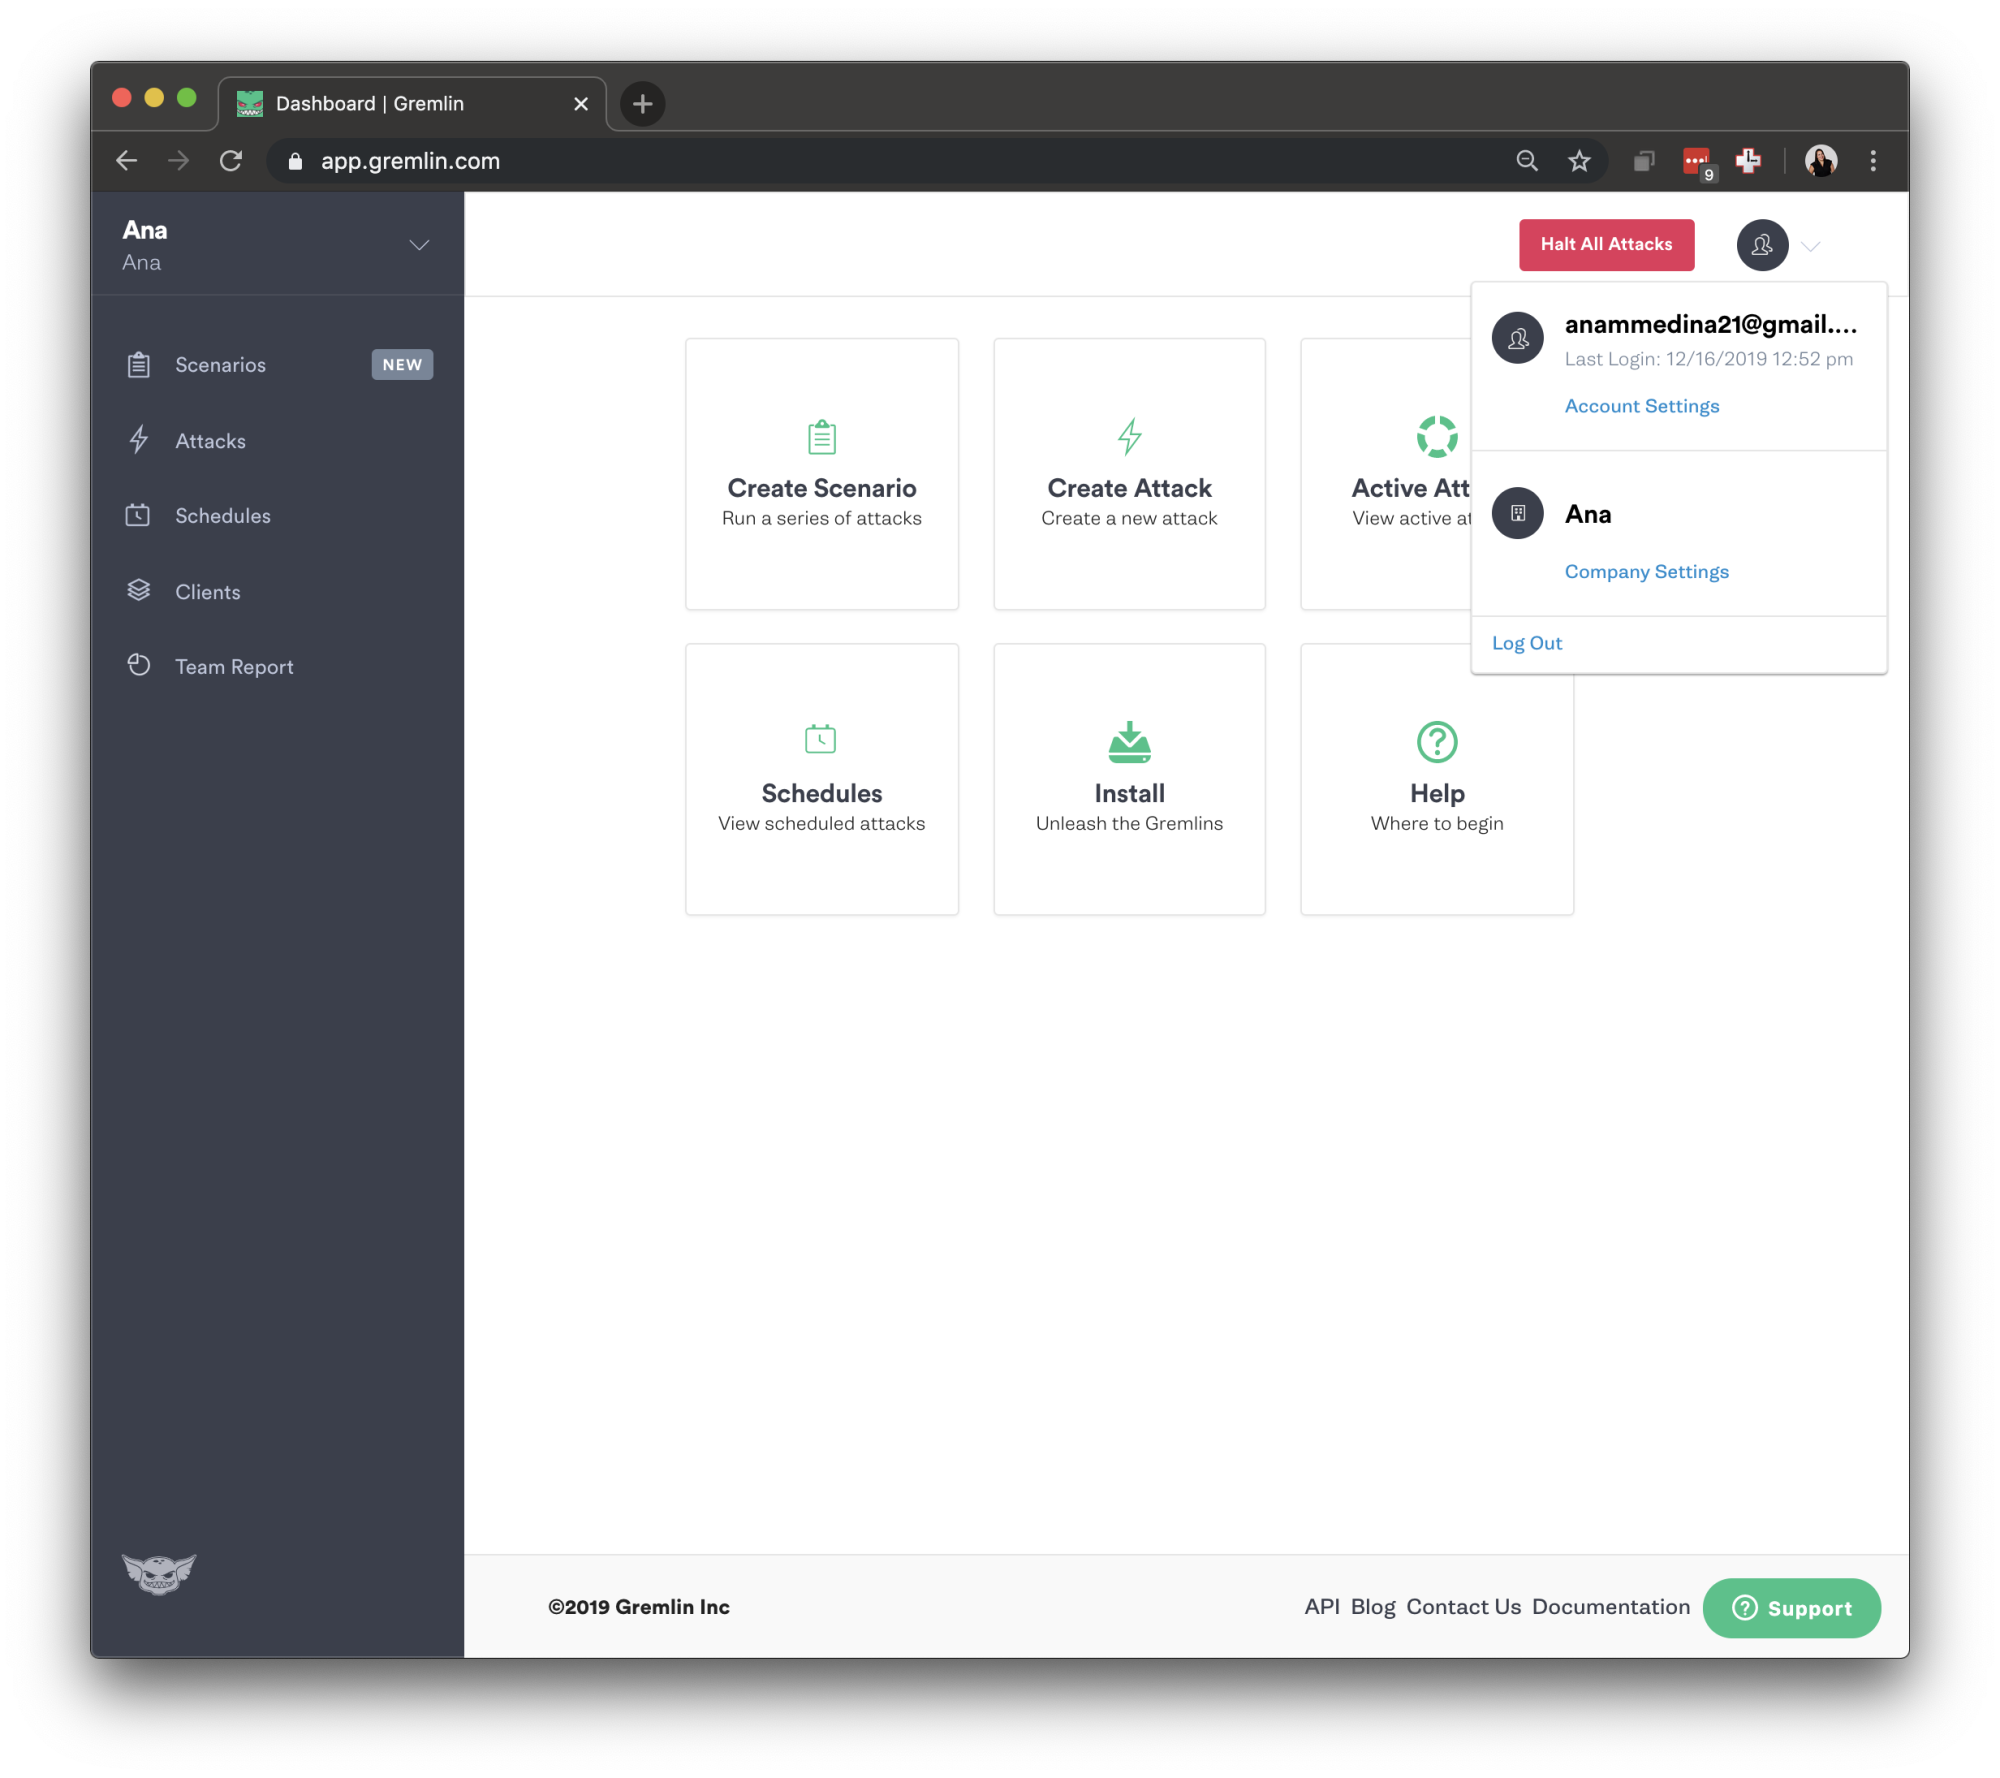
First, make sure you have a Gremlin account (sign up here). Then, we will grab the credentials needed to authenticate the agent we just installed. Log in to the Gremlin App using your Company name and sign-on credentials. (These were emailed to you when you signed up to start using Gremlin.) Click on the right corner circular avatar, selecting “Company Settings”.
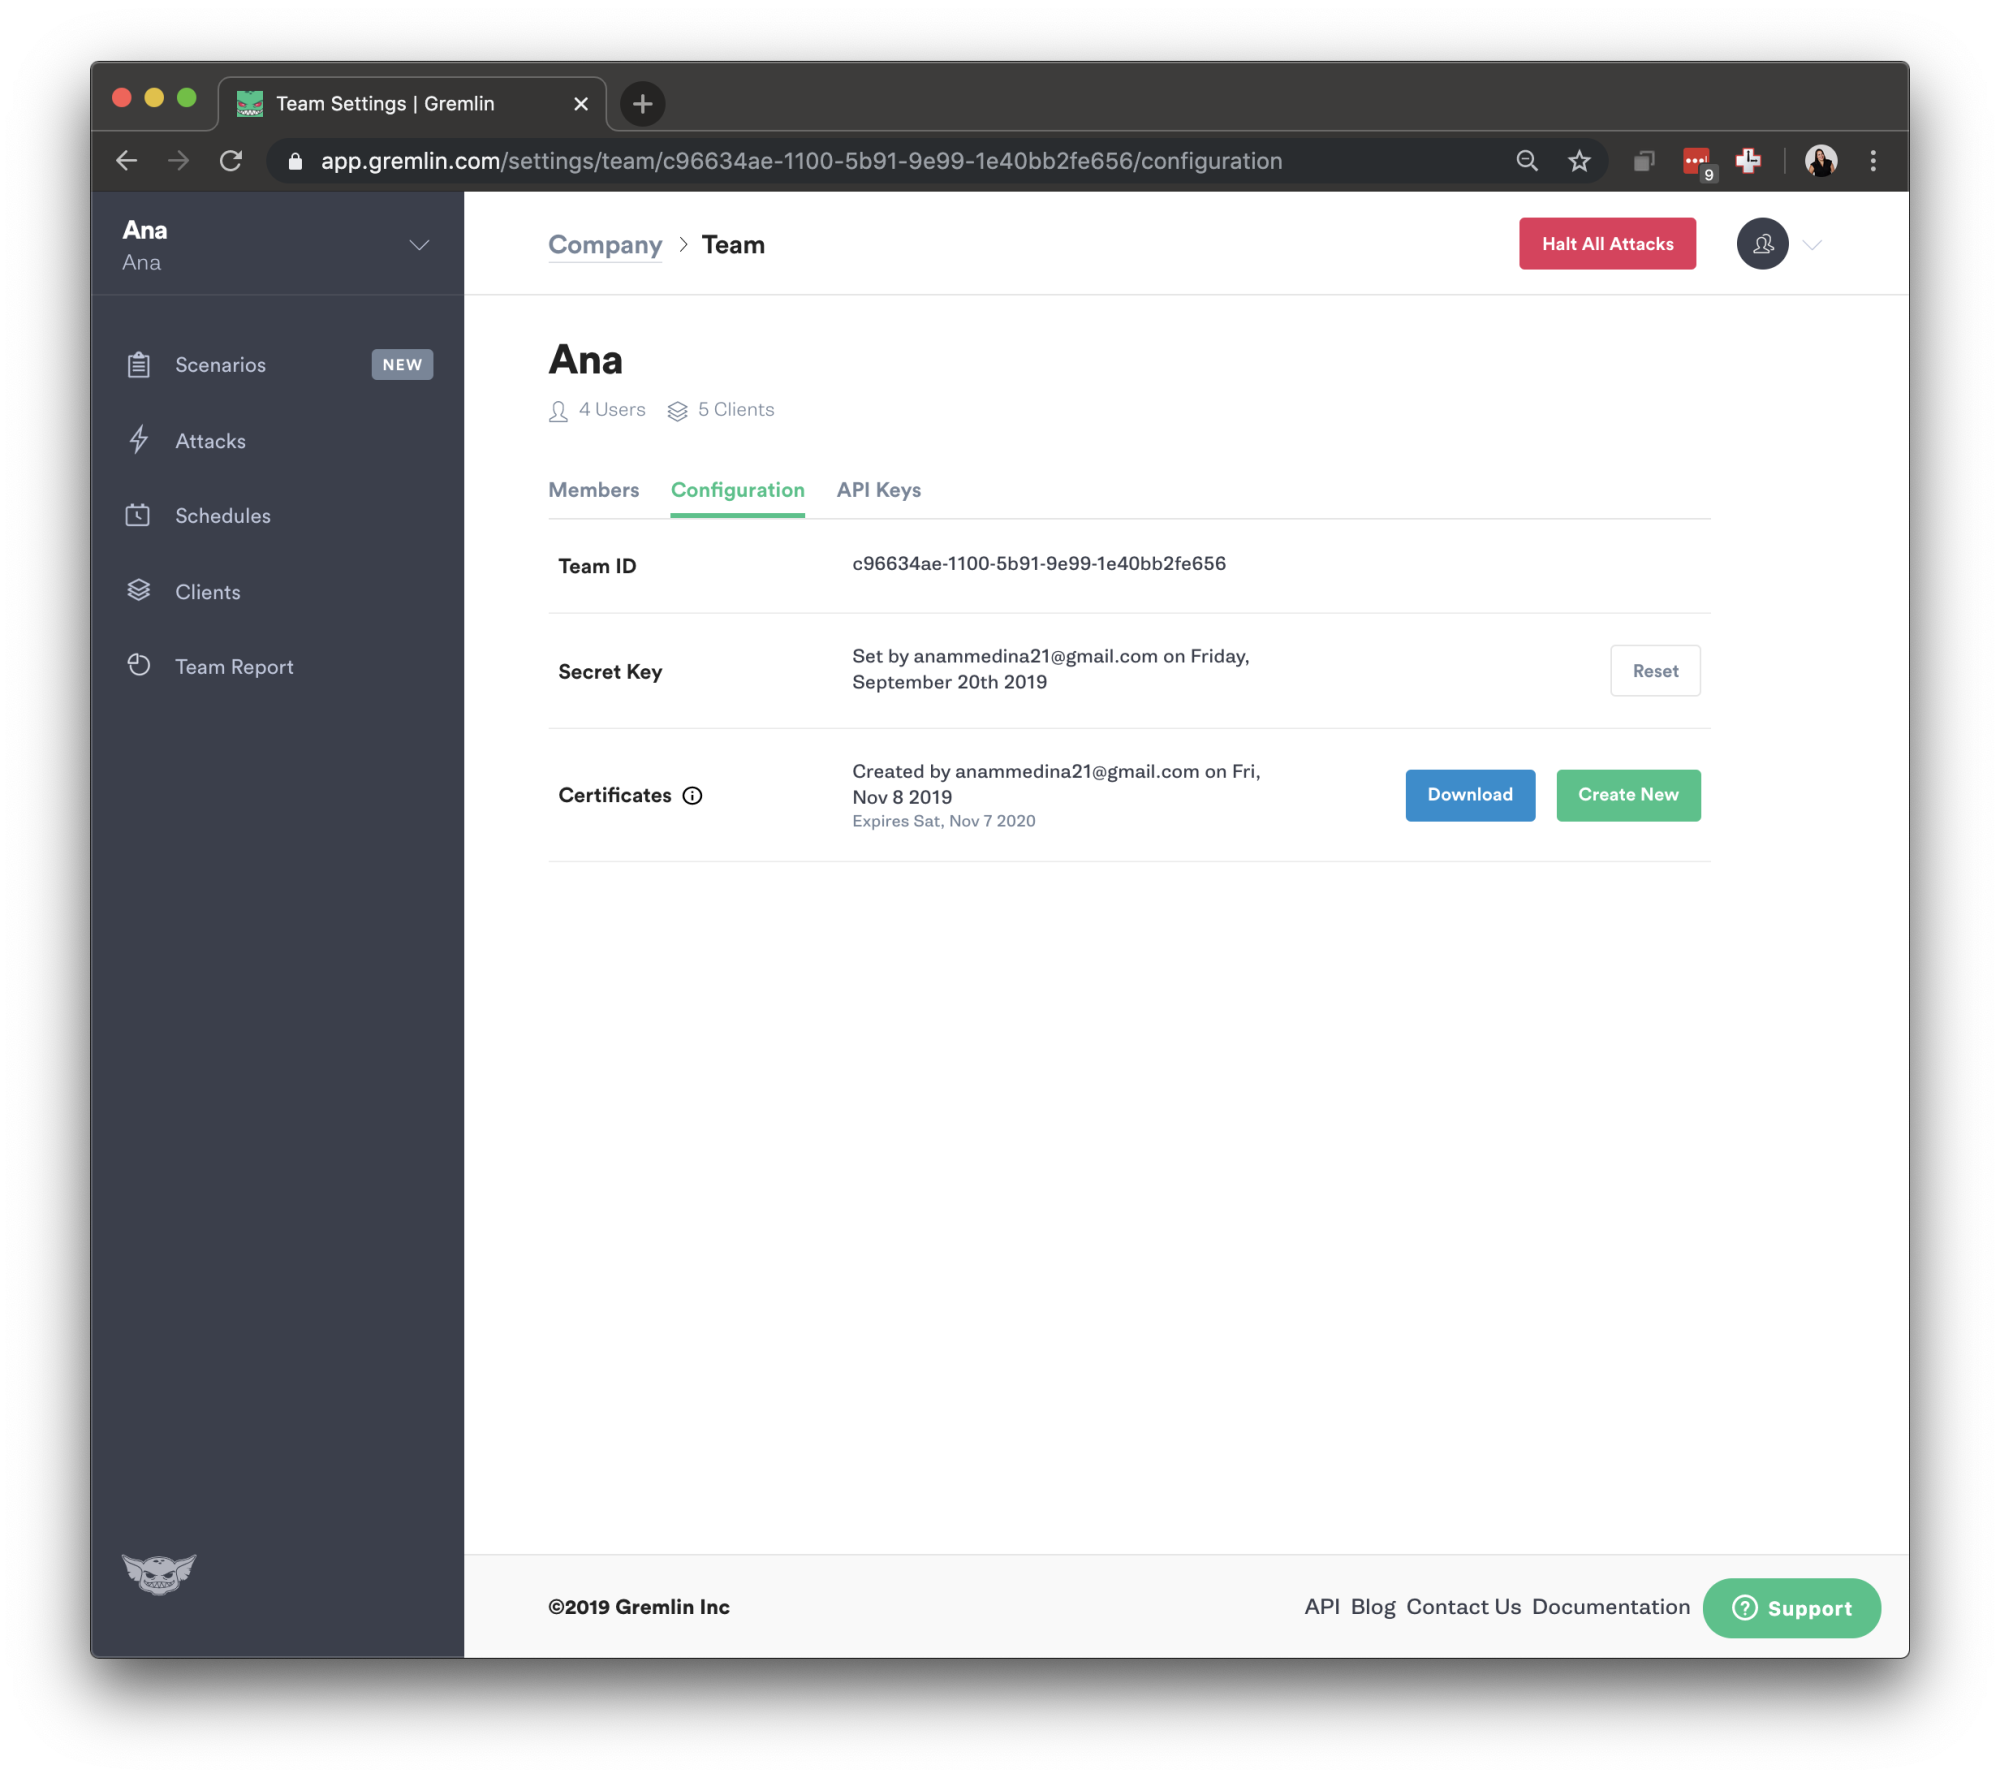
Then, select the team you need. The ID you’re looking for is found under Configuration as “Team ID” click on your Team. Make a note of your Gremlin Secret and Gremlin Team ID.
Now, we will initialize Gremlin and follow the prompts.
1gremlin init
Use the credentials you have saved from the last step.
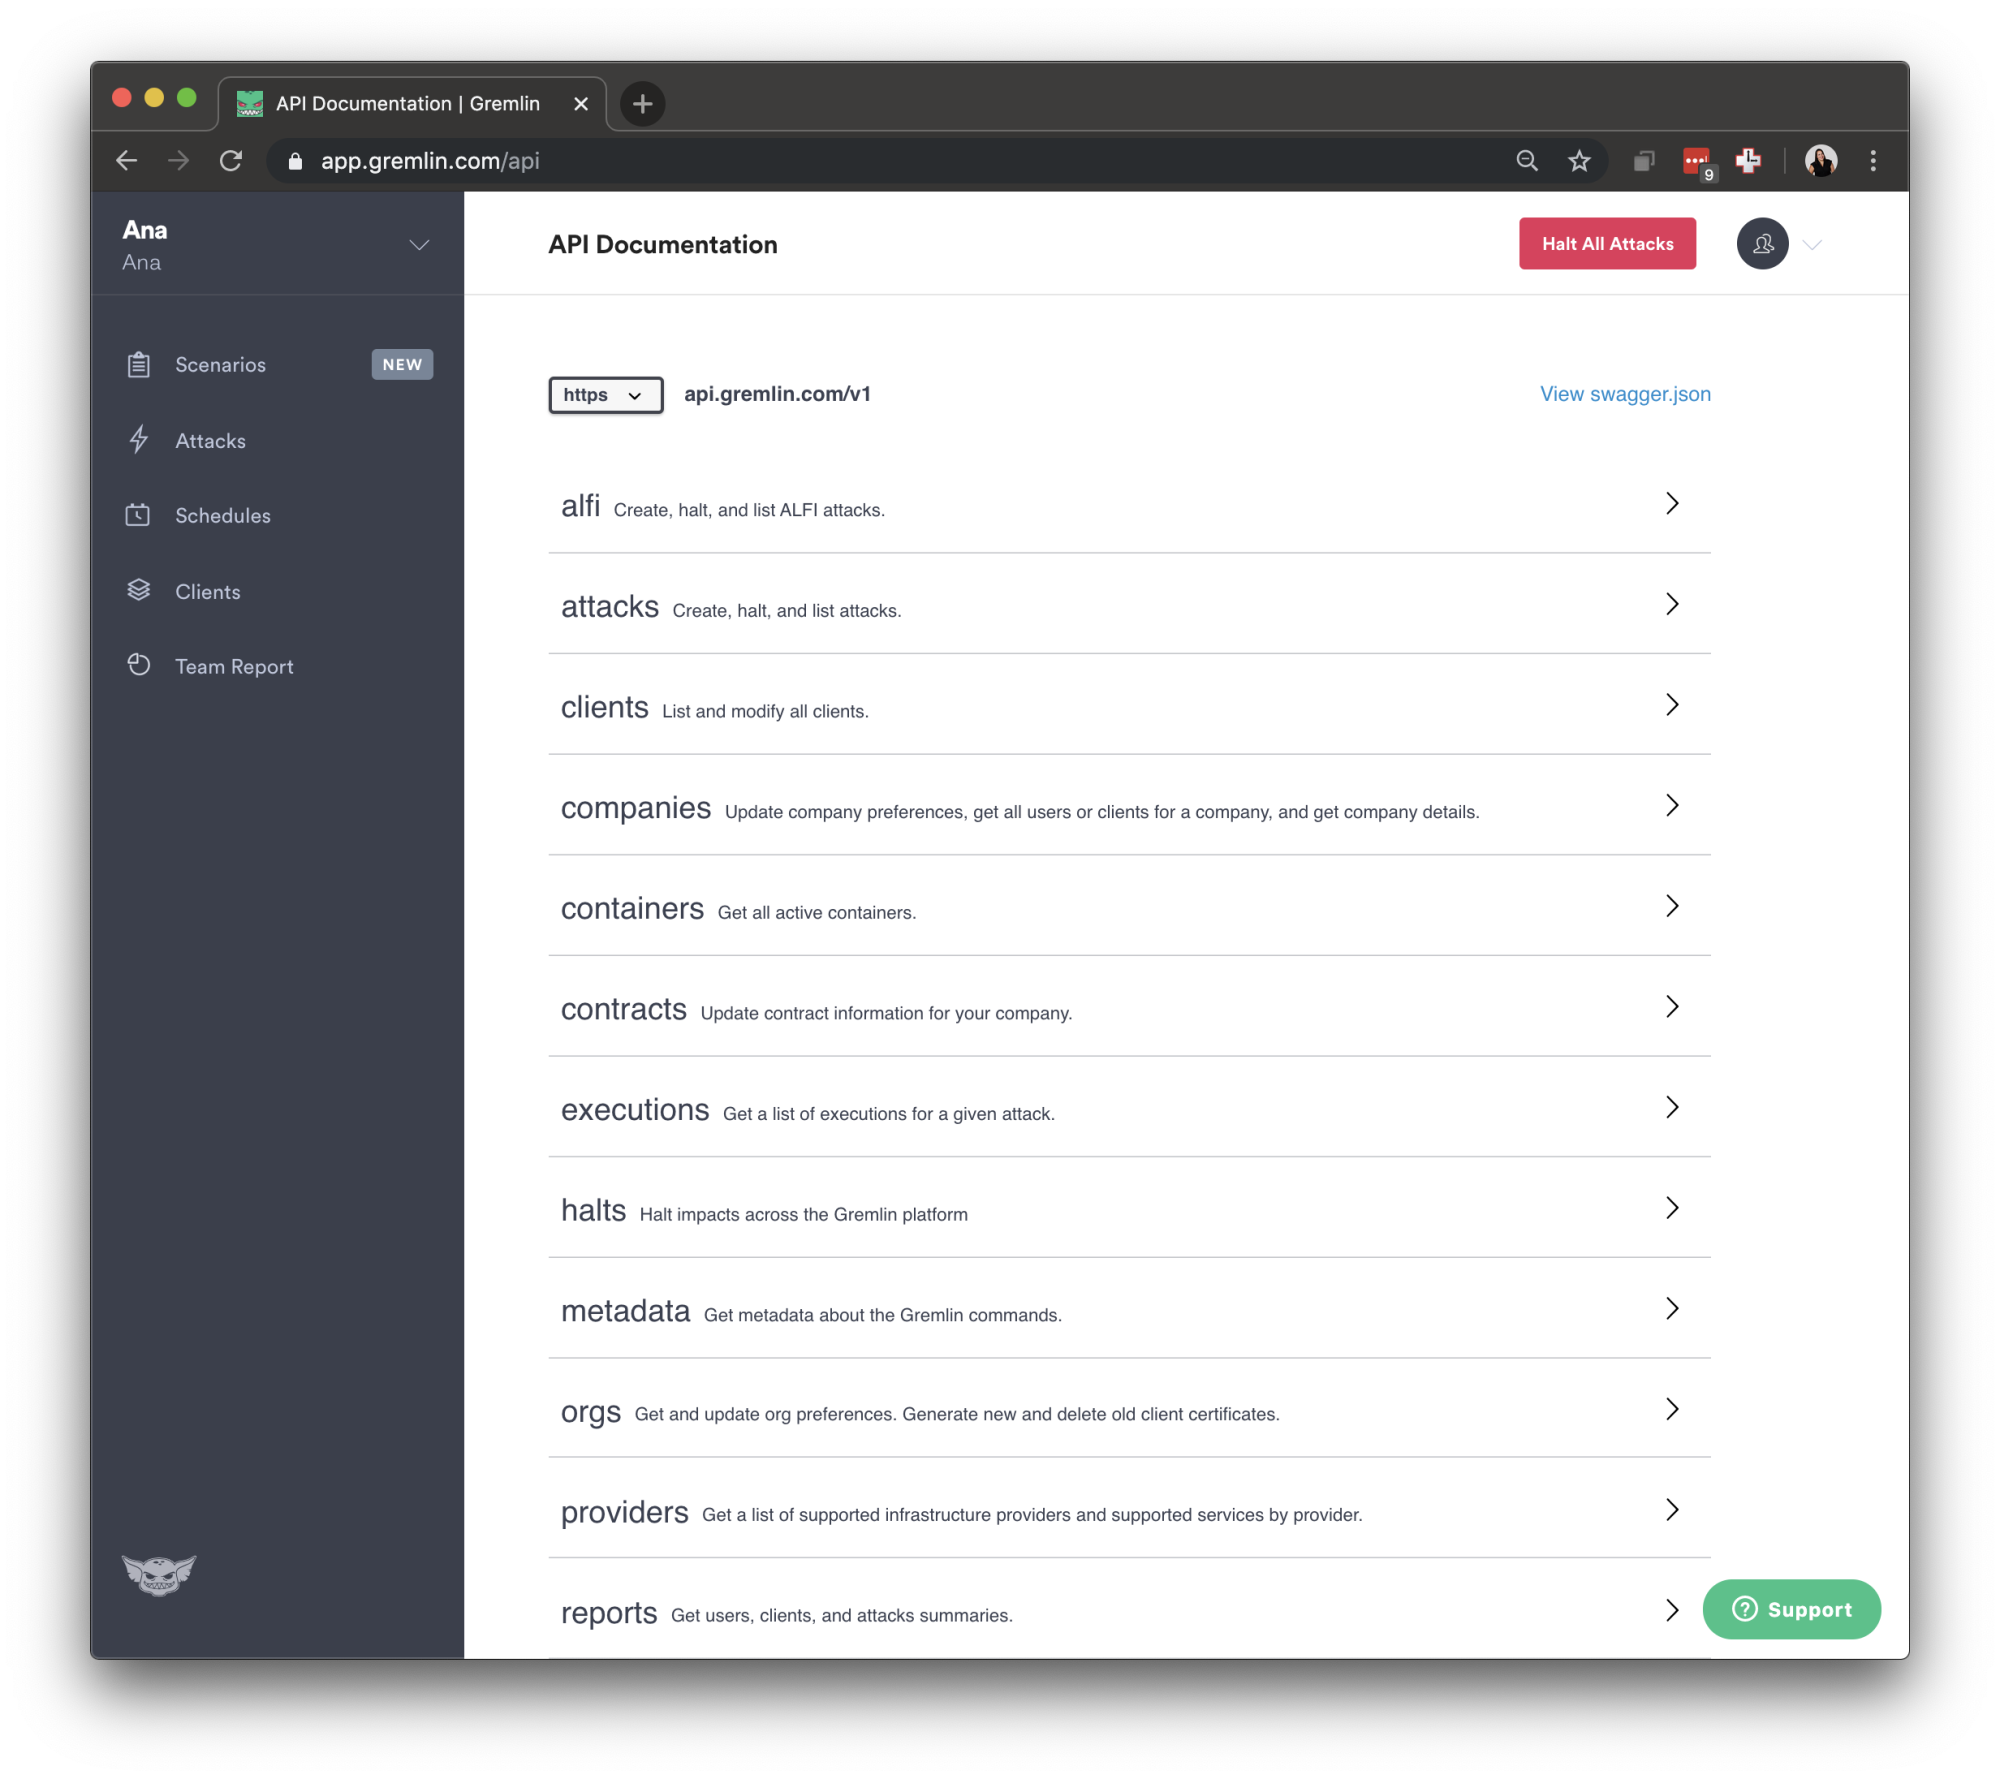
Going back to the Gremlin UI, at the bottom navigation bar you will find a link to our in-depth API documentation.

The API documentation should look like this:
Before starting to play with the API, we need to authenticate our session. We will start by doing a POST request to https://api.gremlin.com/v1/users/auth
Using the terminal on your computer, run:
1curl -X POST --header 'Content-Type: application/x-www-form-urlencoded' \2 --data-urlencode 'email=gremlin@gremlin.com' \3 --data-urlencode 'password=P@ssw0rd1!' \4 --data-urlencode 'companyName=Chaos' \5 'https://api.gremlin.com/v1/users/auth'
The output will include your access token, it will look something like this if you’re part of more than one organization.
1{2 "role": "SUPER",3 "company_name": "Chaos",4 "last_login": "2019-07-31T21:27:26.308Z",5 "company_id": "c96634ae-1100-5b91-9e99-1e40bb2fe656",6 "company_is_alfi_enabled": true,7 "expires_at": "2019-08-01T04:29:16.545Z",8 "header": "Bearer MTZhY2RjZDEtMjIxYi01YjZjLThhN2EtYTgyOWFmN2ZjYmVhOmFuYW1tZWRpbmEyMUBnbWFpbC5jb206NTZlYzNmZTYtYjNiMC0xMWU5LWJhMzctMDI0MmQyMzAyY2Yy",9 "identifier": "gremlin@gremlin.com",10 "org_id": "16acdcd1-221b-5b6c-8a7a-a829af7fcbea",11 "org_name": " Thoughtful Chaos Experiments",12 "renew_token": "3a354e60-56a2-4745-b54e-6056a2a74592",13 "token": "56ec3fe6-b3b0-11e9-ba37-0242d2302cf2",14 "tier": "Enterprise"15 },16 {17 "role": "SUPER",18 "company_name": "Chaos",19 "last_login": "2019-07-31T21:27:26.313Z",20 "company_id": "c96634ae-1100-5b91-9e99-1e40bb2fe656",21 "company_is_alfi_enabled": true,22 "expires_at": "2019-08-01T08:54:39.108Z",23 "header": "Bearer Yzk2NjM0YWUtMTEwMC01YjkxLTllOTktMWU0MGJiMmZlNjU2OmFuYW1tZWRpbmEyMUBnbWFpbC5jb206Njk4MjhjNjAtYjNkNS0xMWU5LWI2OWUtMDI0MmY2MjBhODZi",24 "identifier": "gremlin@gremlin.com",25 "org_id": "c96634ae-1100-5b91-9e99-1e40bb2fe656",26 "org_name": "Break Things on Purpose",27 "renew_token": "fe581c56-22b1-4943-981c-5622b1c94303",28 "token": "69828c60-b3d5-11e9-b69e-0242f620a86b",29 "tier": "Enterprise"30 }
If you have MFA enabled, include the token from your password authenticator in your call to /users/auth/mfa/auth. You can see a sample request with MFA enabled below.
1curl -X POST --header 'Content-Type: application/x-www-form-urlencoded' \2 --data-urlencode 'email=gremlin@gremlin.com' \3 --data-urlencode 'password=changeit' \4 --data-urlencode 'token=000000' \5 'https://api.gremlin.com/v1/users/auth/mfa/auth?getCompanySession=true'
Note the Bearer token from the value of "header", we can make than environment variable using export.
1export bearertoken="Bearer Yzk2NjM0YWUtMTEwMC01YjkxLTllOTktMWU0MGJiMmZlNjU2OmFuYW1tZWRpbmEyMUBnbWFpbC5jb206Njk4MjhjNjAtYjNkNS0xMWU5LWI2OWUtMDI0MmY2MjBhODZi"
You can also find the Bearer token on the Gremlin Attack Page using Gremlin Examples.
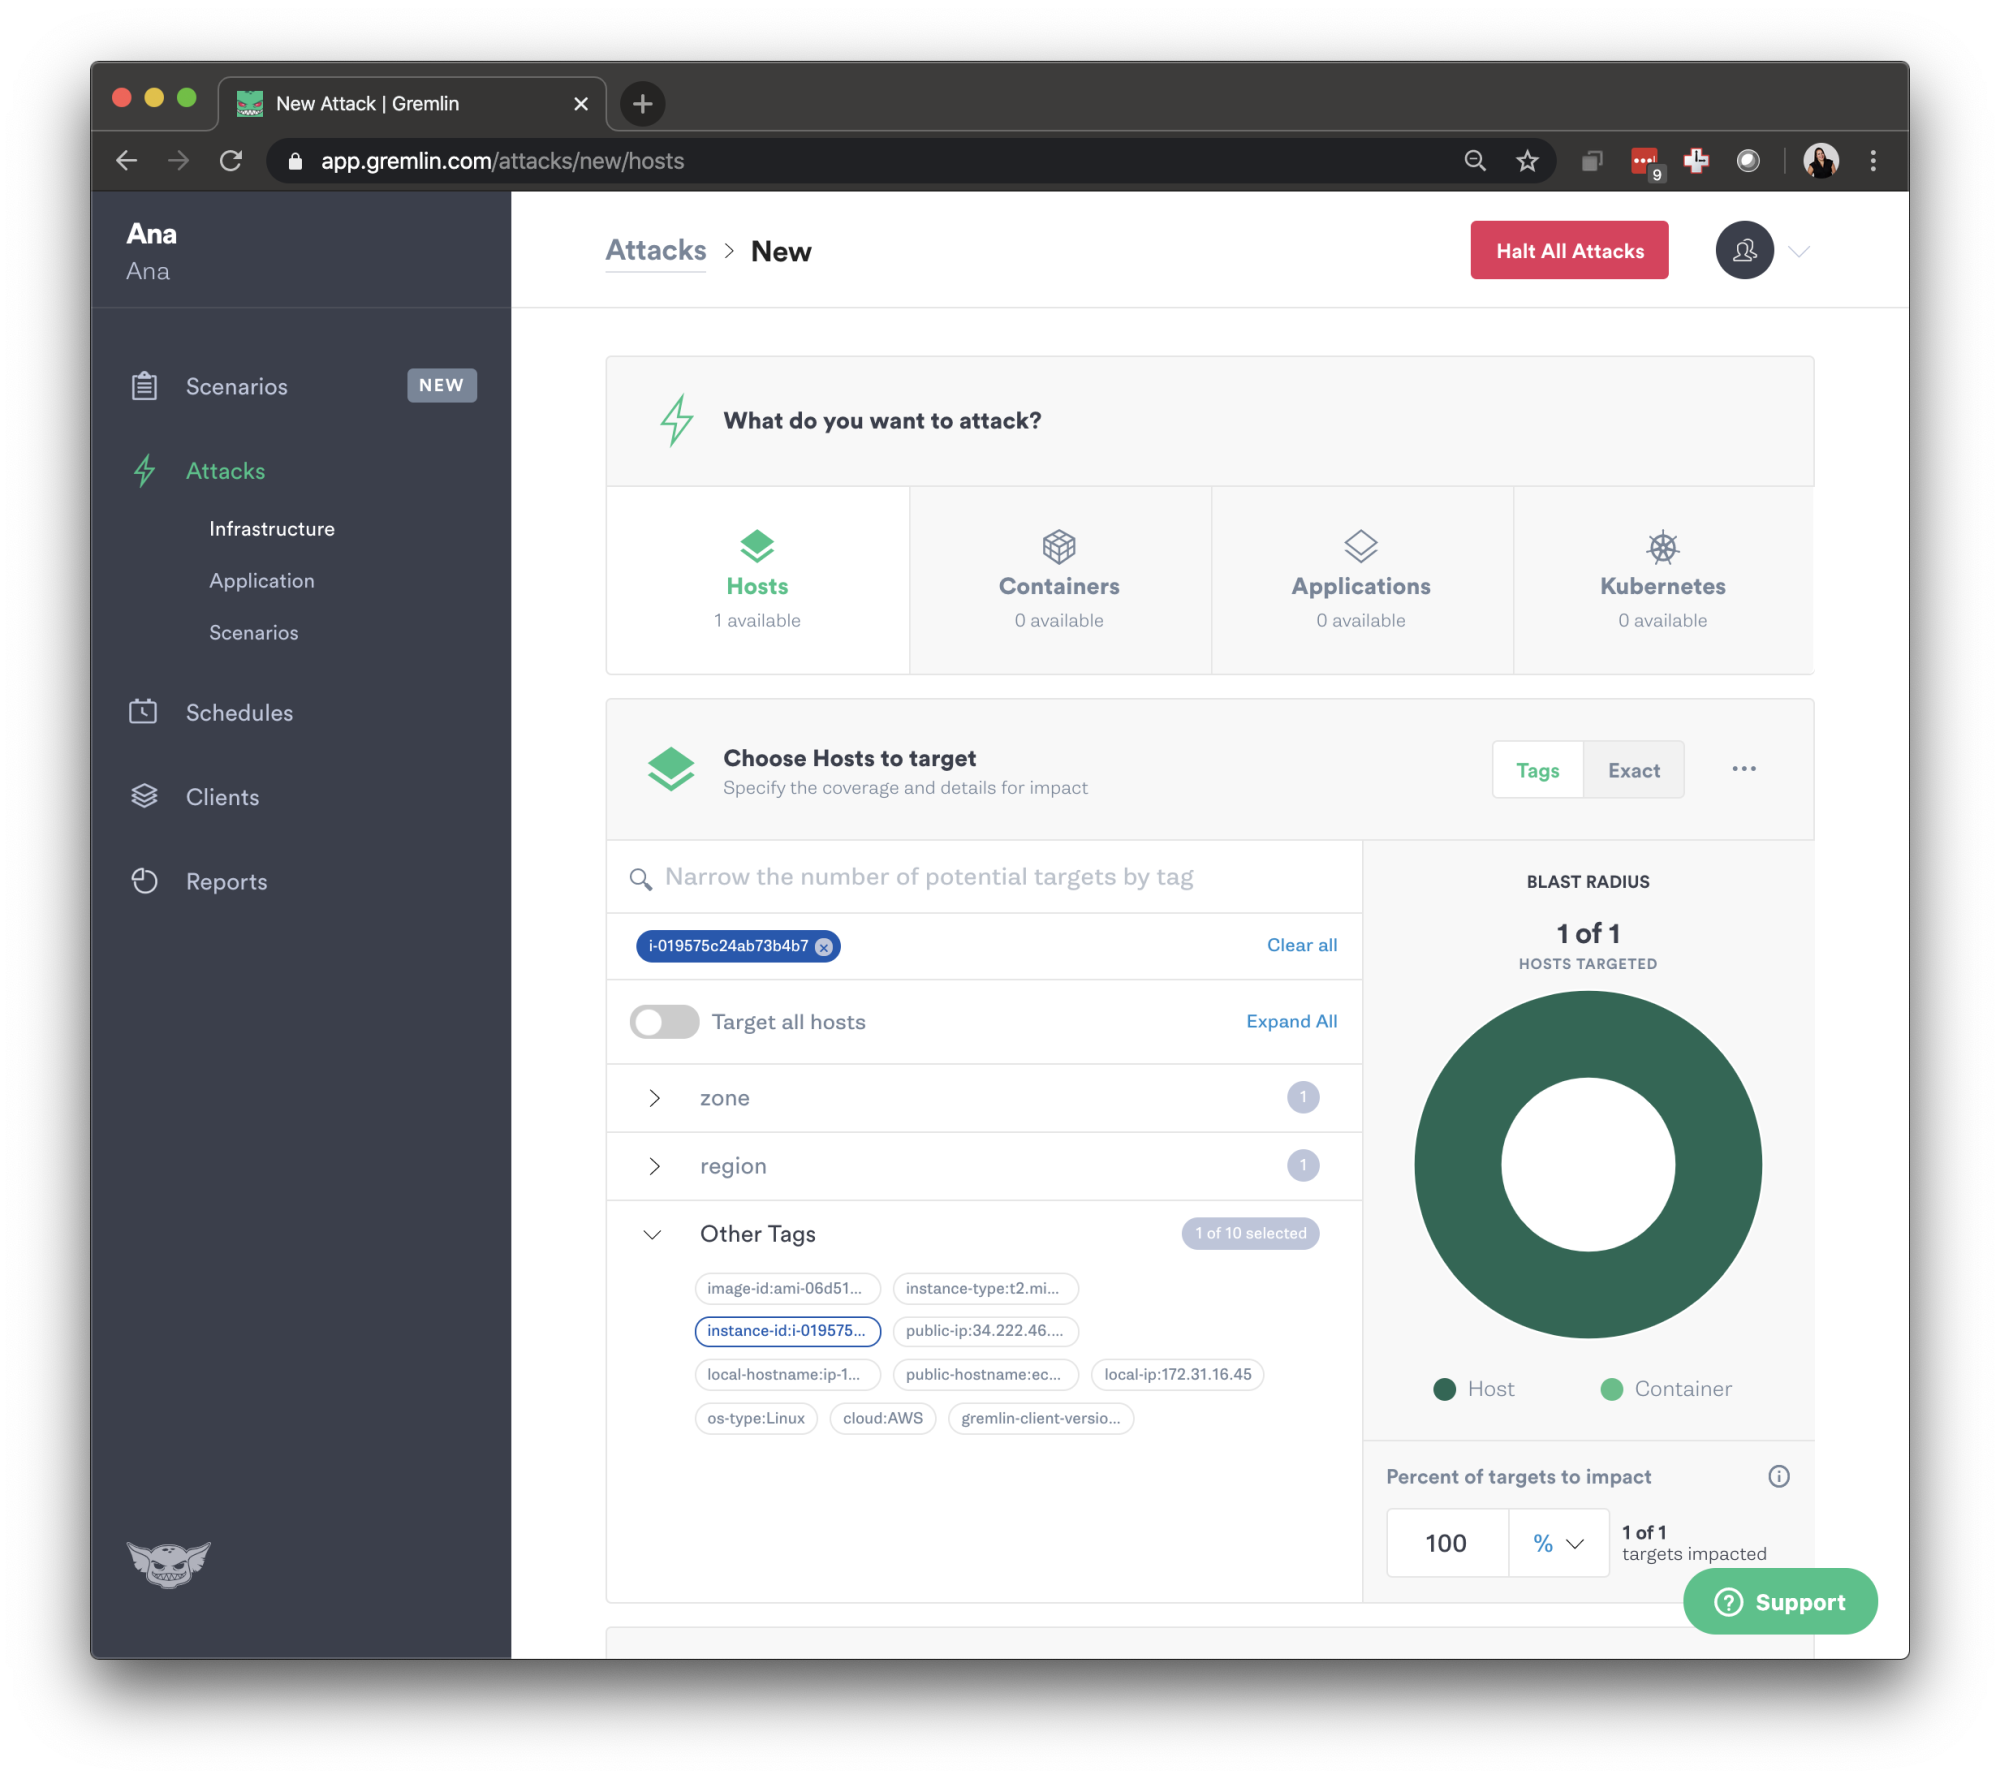
Going to the Gremlin's Attack Page, select New Attack, Select the Host you want by using the instance-id.
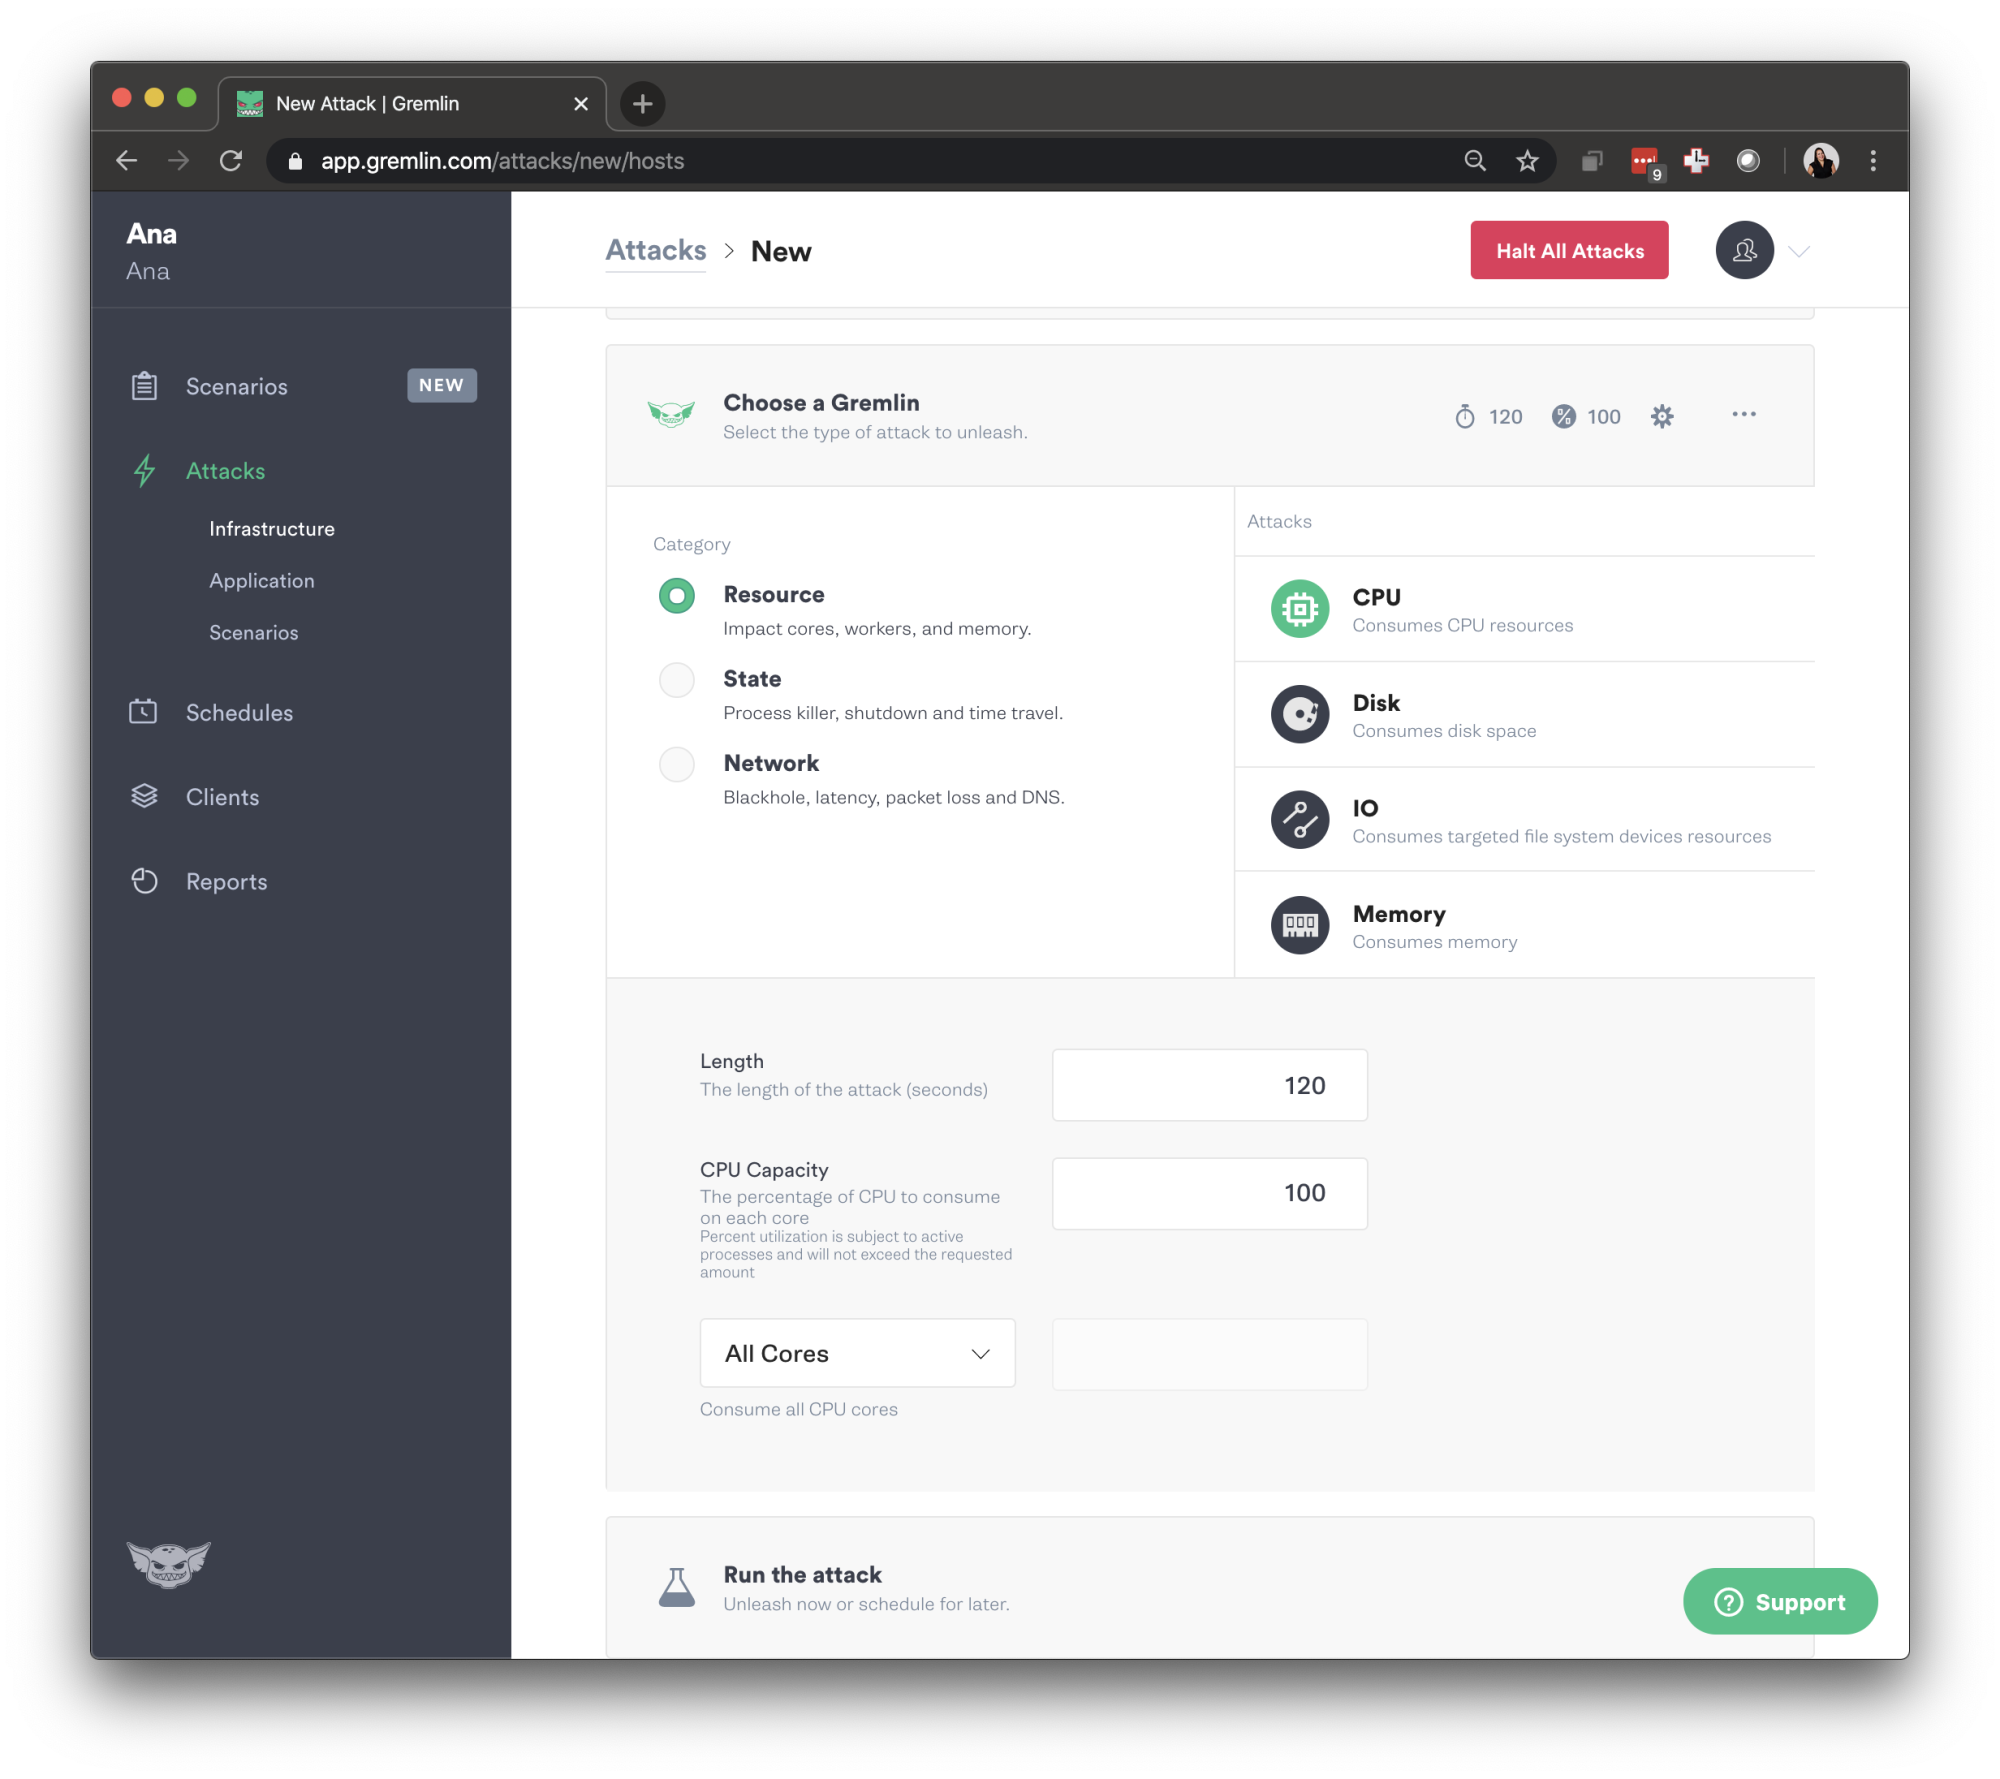
Then, select the Resource Attacks and choose CPU Attack that runs for 120 seconds (2 mins), it targets 100% of all cores.
Before unleashing the attack, scroll down and select "Gremlin API Examples" and find the CURL commands, endpoints, request headers, and request bodies.
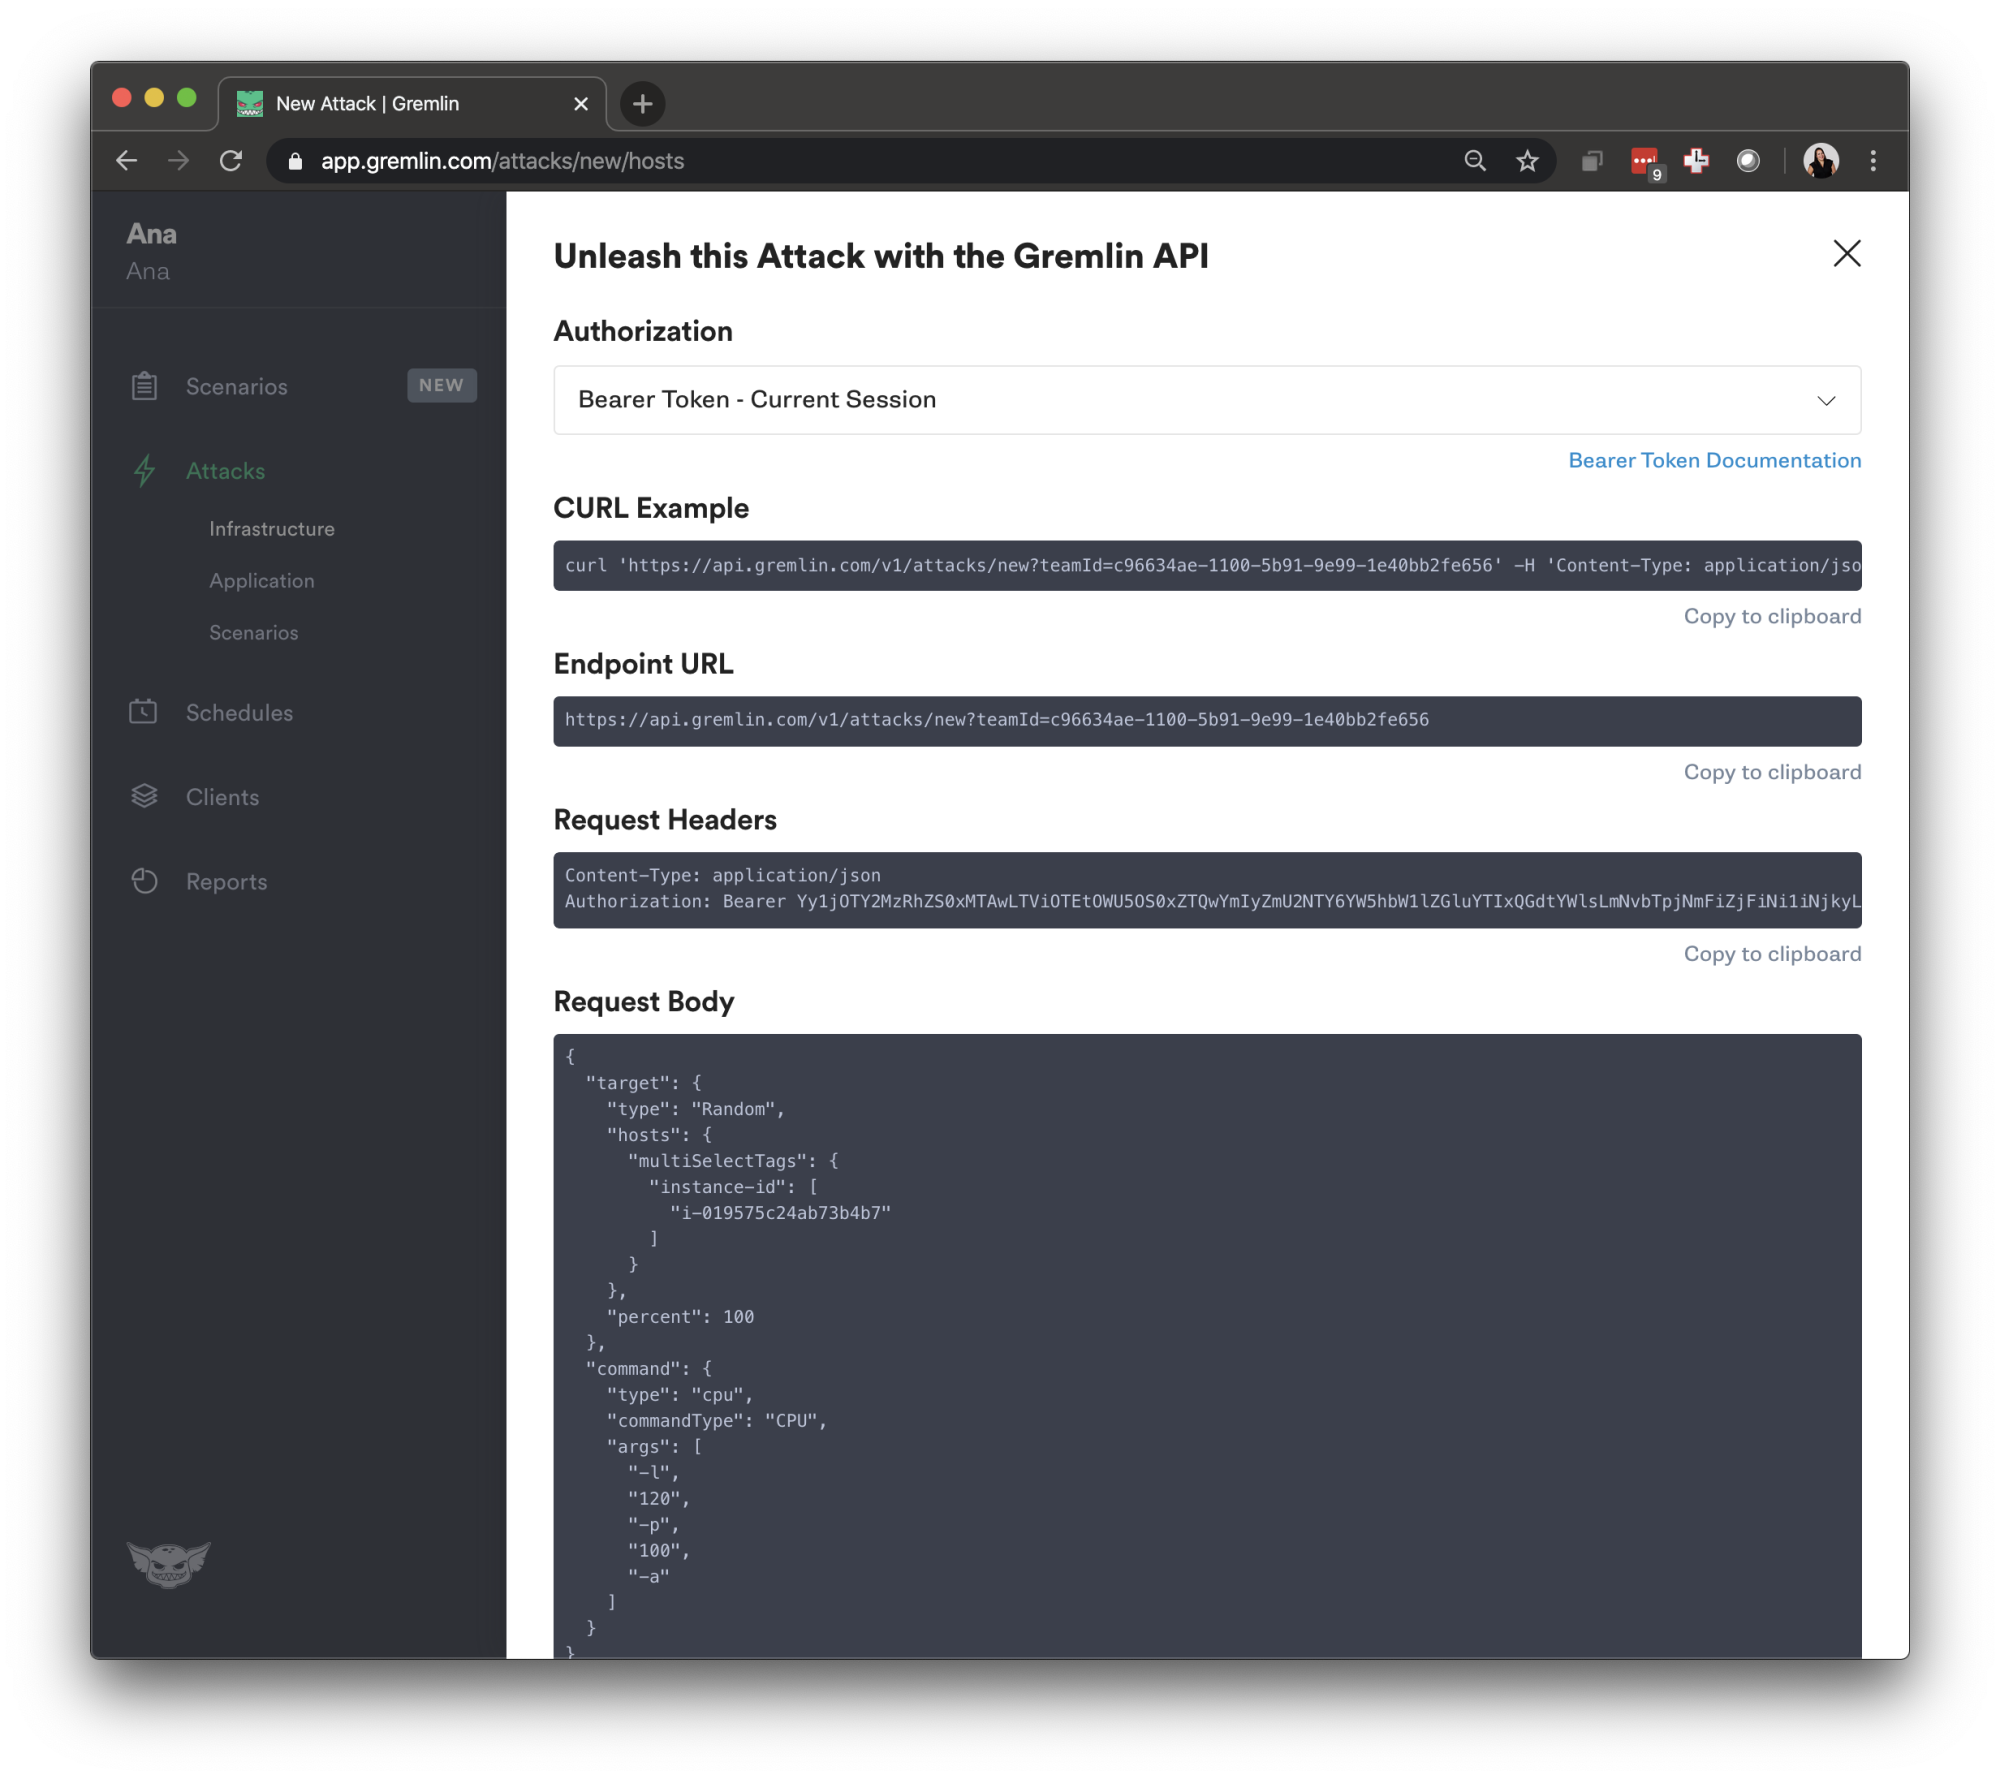
\ Press "copy to clipboard" on the CURL command and run it on your terminal, you will be returned the execution ID.
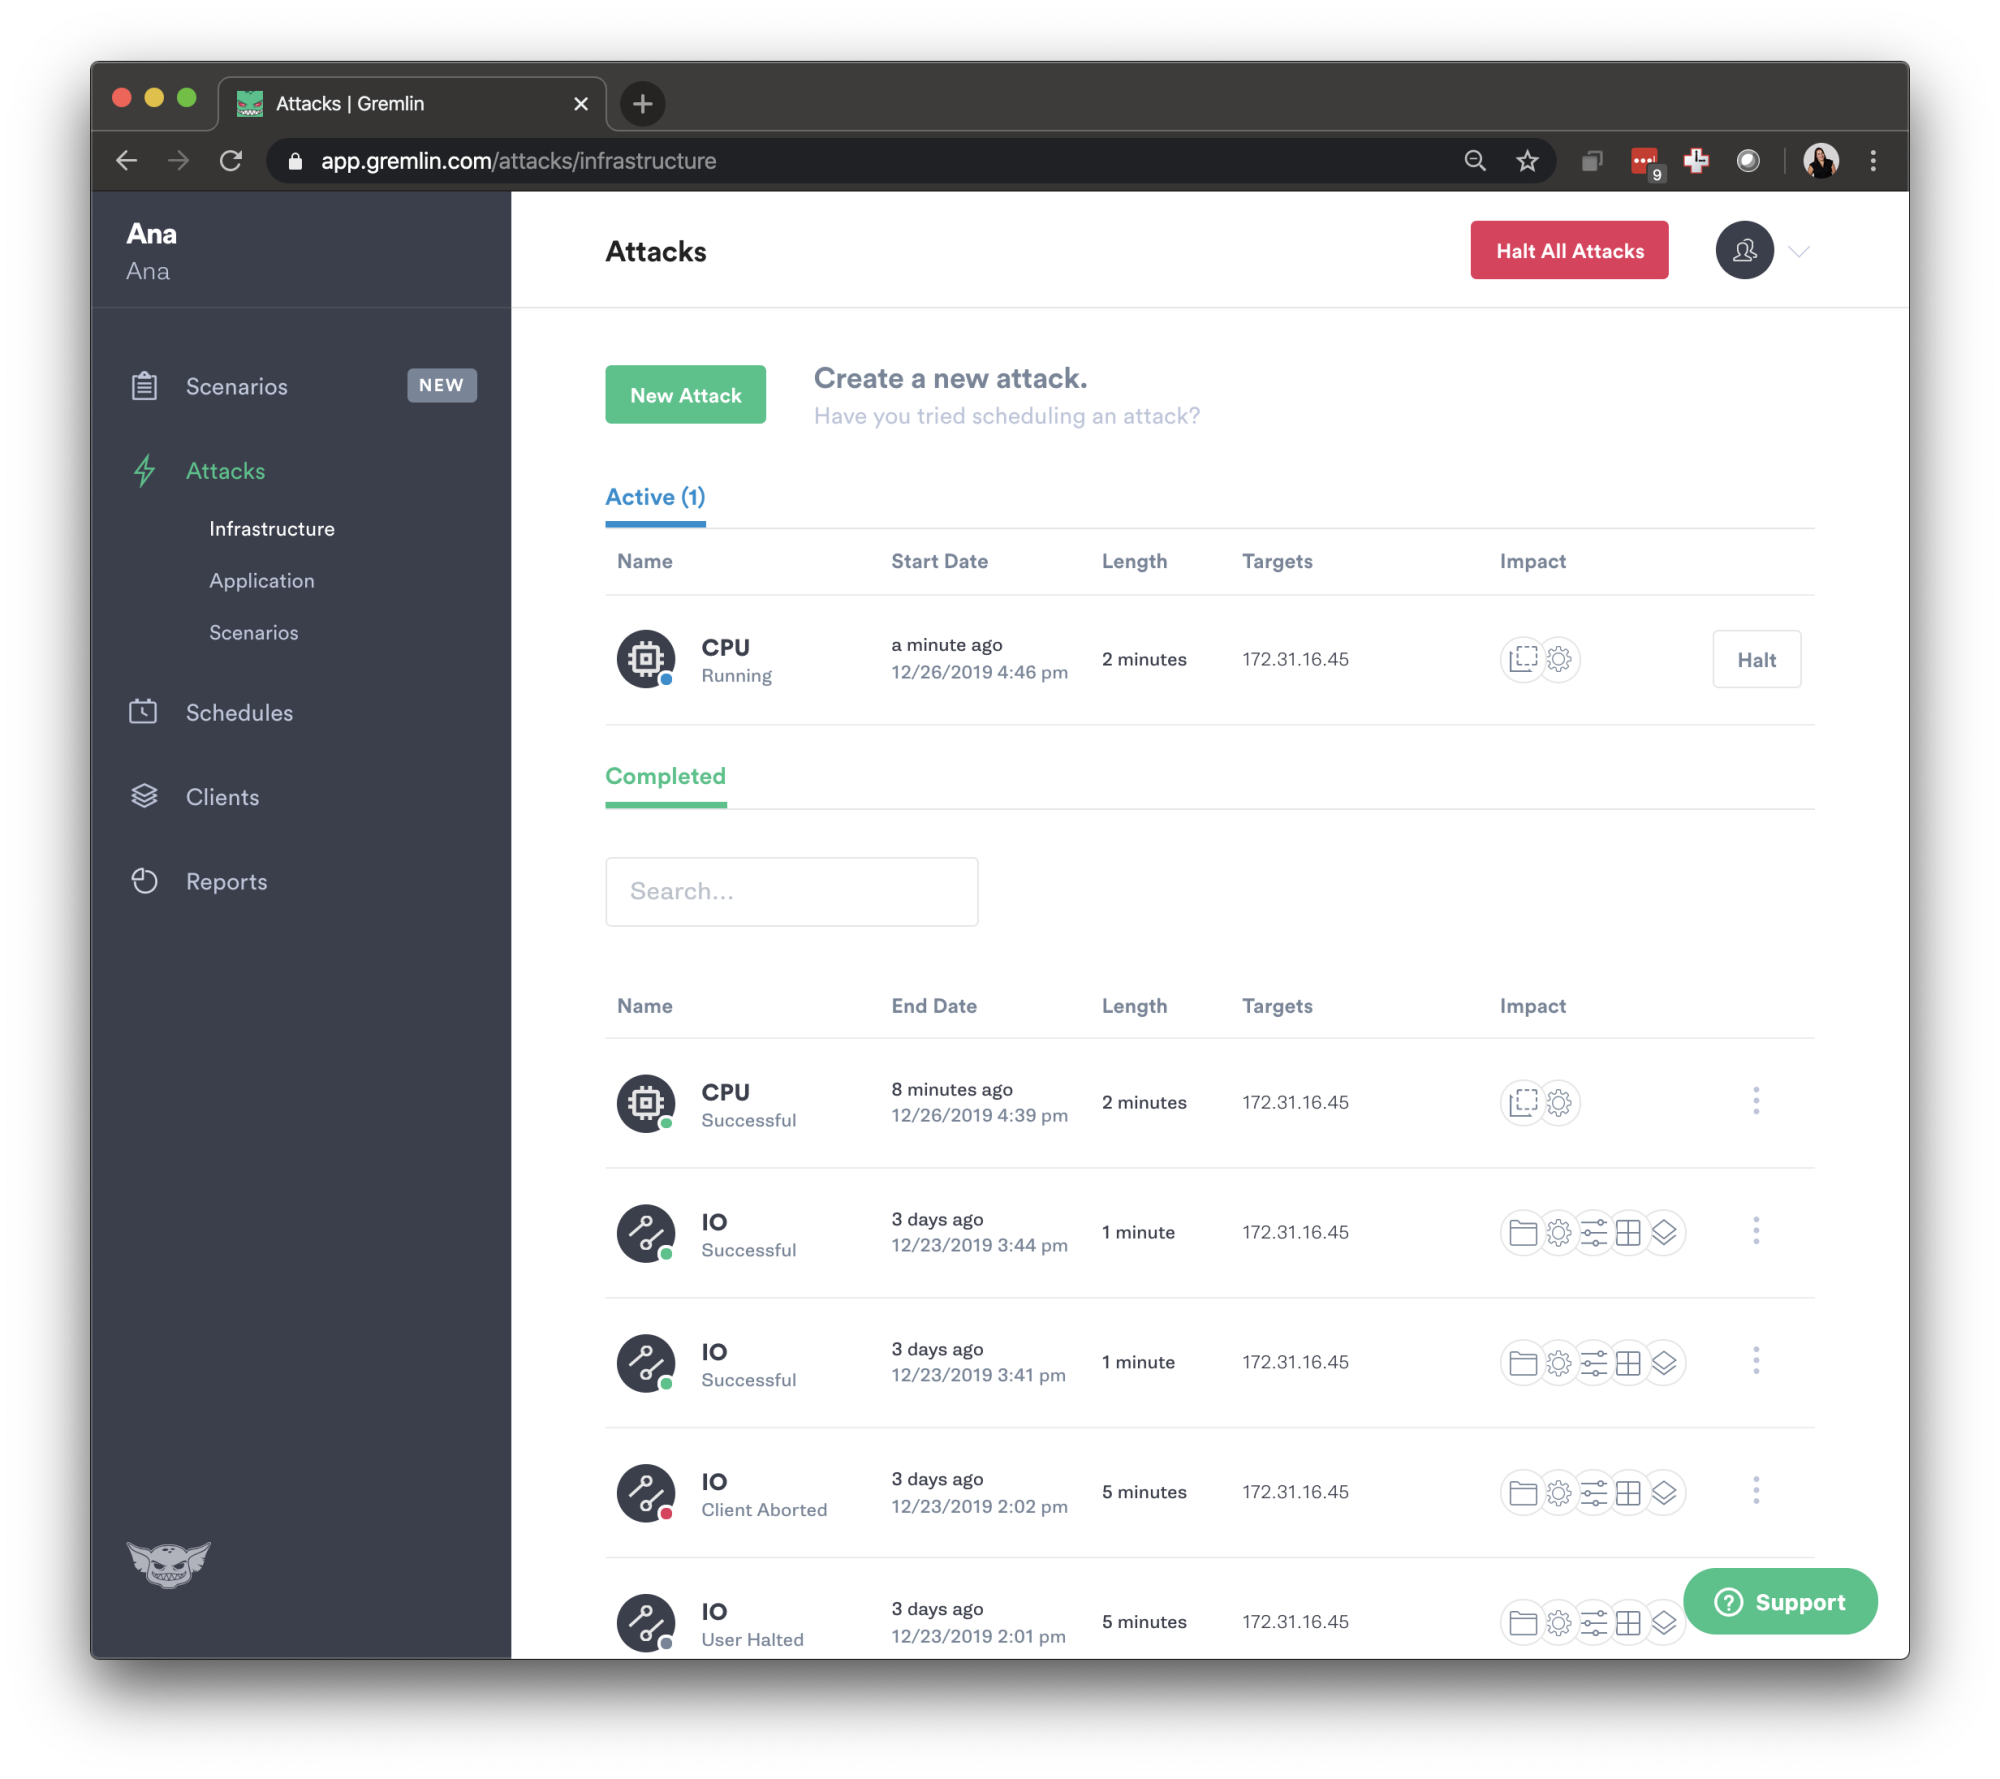
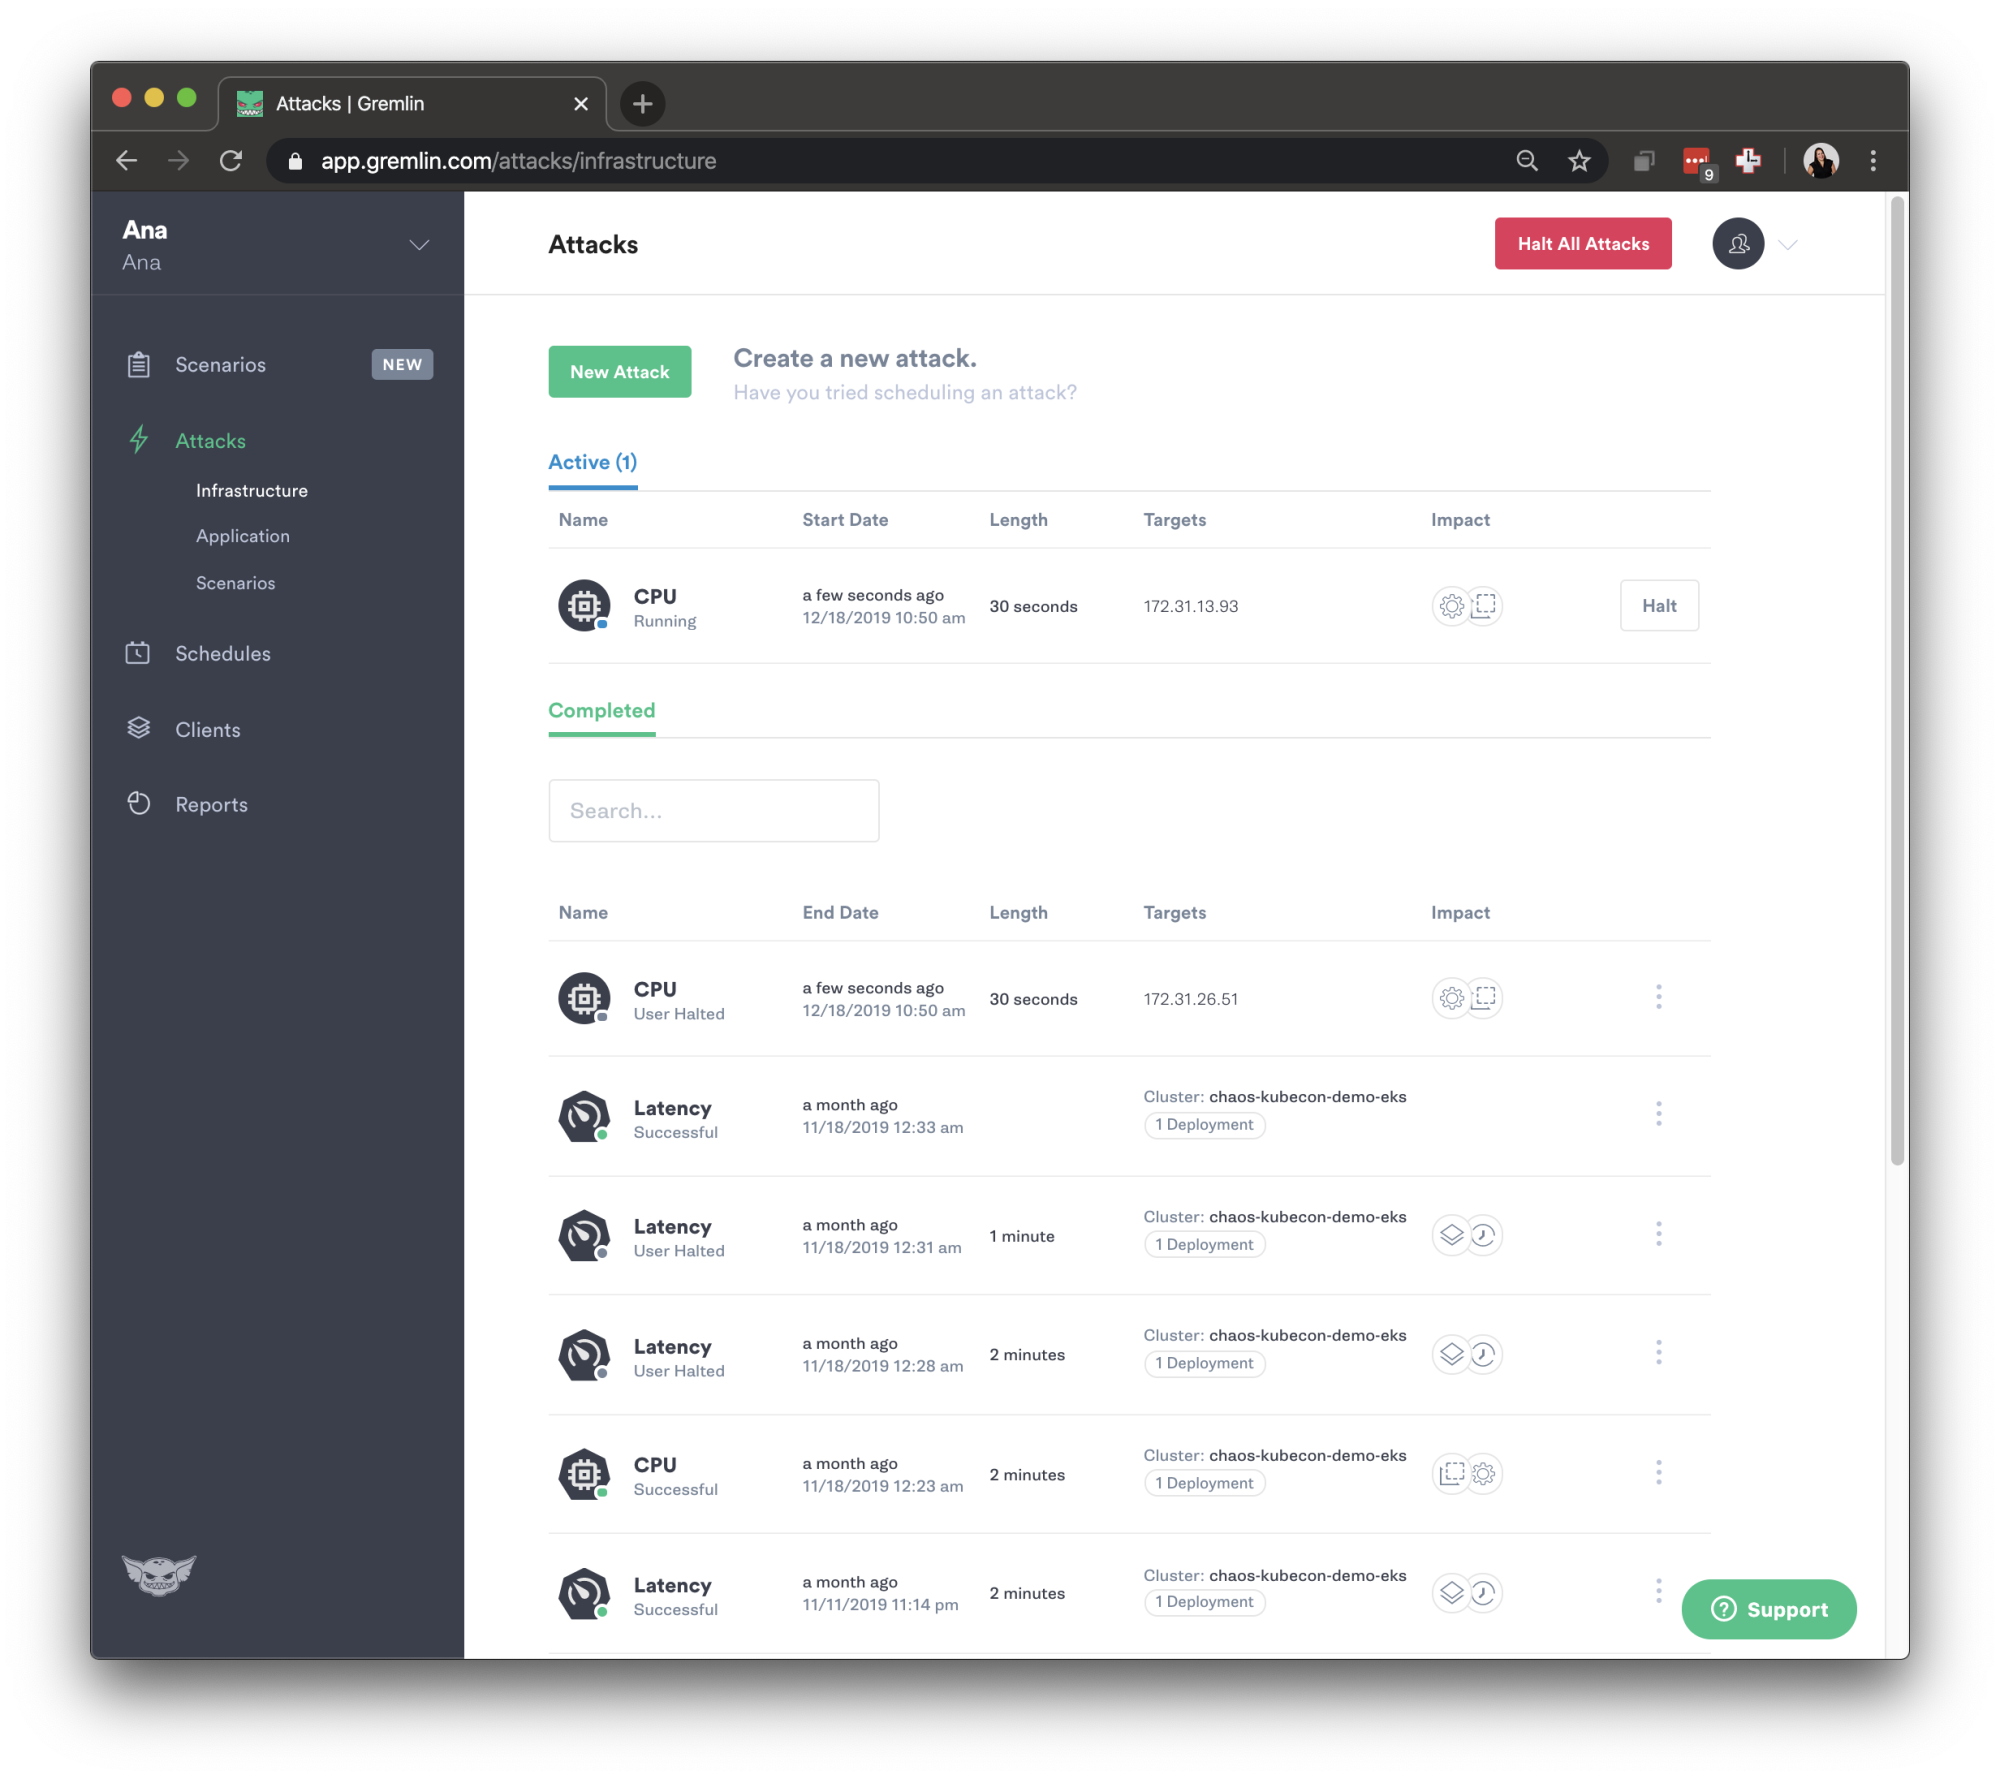
You can then go to attacks to verify that the attack is running.
Using the $bearertoken we just created, let’s start our first Chaos Engineering attack. We have only installed Gremlin on one host and we will set the target as random. This experiment will be a CPU Attack that runs for 120 seconds (2 mins), it targets 100% of all cores. Make sure to switch out the teamID with your own.
1curl -X POST \2 --header "Content-Type: application/json" \3 --header "Authorization: $bearertoken" \4 https://api.gremlin.com/v1/attacks/new?teamId=c96634ae-1100-5b91-9e99-1e40bb2fe656 \5 --data '6 {7 "command": { "type": "cpu", "args": ["-c", "1", "--length", "120"] },8 "target": { "type": "Random" }9 }'
The API will return the execution ID like this:
443bf563-21c7-11ea-b4dc-024221b6d1e6
We can now use the Gremlin API to get the attack details, make sure to edit your teamID and execution ID:
1curl -X GET "https://api.gremlin.com/v1/attacks/443bf563-21c7-11ea-b4dc-024221b6d1e6?teamId=c96634ae-1100-5b91-9e99-1e40bb2fe656" \2 --header "Authorization: $bearertoken" \3 -H "accept: application/json"
The API will return the attack’s details and let you know if the attack is in progress, halted, or successful.
1{2 "infra_target": {3 "resolvedHosts": [4 "172.31.13.93"5 ],6 "targetType": "Host",7 "strategy": {8 "multiSelectLabels": {},9 "multiSelectTags": {},10 "count": 111 },12 "strategyType": "Random"13 },14 "target_type": "Host",15 "version": 4,16 "targets": [17 "172.31.13.93"18 ],19 "org_id": "c96634ae-1100-5b91-9e99-1e40bb2fe656",20 "args": [21 "cpu",22 "-c",23 "1",24 "--length",25 "30"26 ],27 "created_at": "2019-12-18T18:50:31.523Z",28 "create_source": "Api",29 "stage": "Successful",30 "execution_stage_summary": {31 "Successful": 132 },33 "infra_command": {34 "commandType": "CPU",35 "commandArgs": {36 "allCores": false,37 "cores": 1,38 "length": 30,39 "percent": 10040 }41 },42 "stage_lifecycle": "Complete",43 "guid": "443bf563-21c7-11ea-b4dc-024221b6d1e6",44 "create_user": "anammedina21@gmail.com",45 "start_time": "2019-12-18T18:50:31.521Z",46 "end_time": "2019-12-18T18:51:19.539Z",47 "updated_at": "2019-12-18T18:51:19.540Z",48 "kind": "Api"49}
We can also verify the attack has run by going back to the Gremlin UI and navigating to our Attacks page.
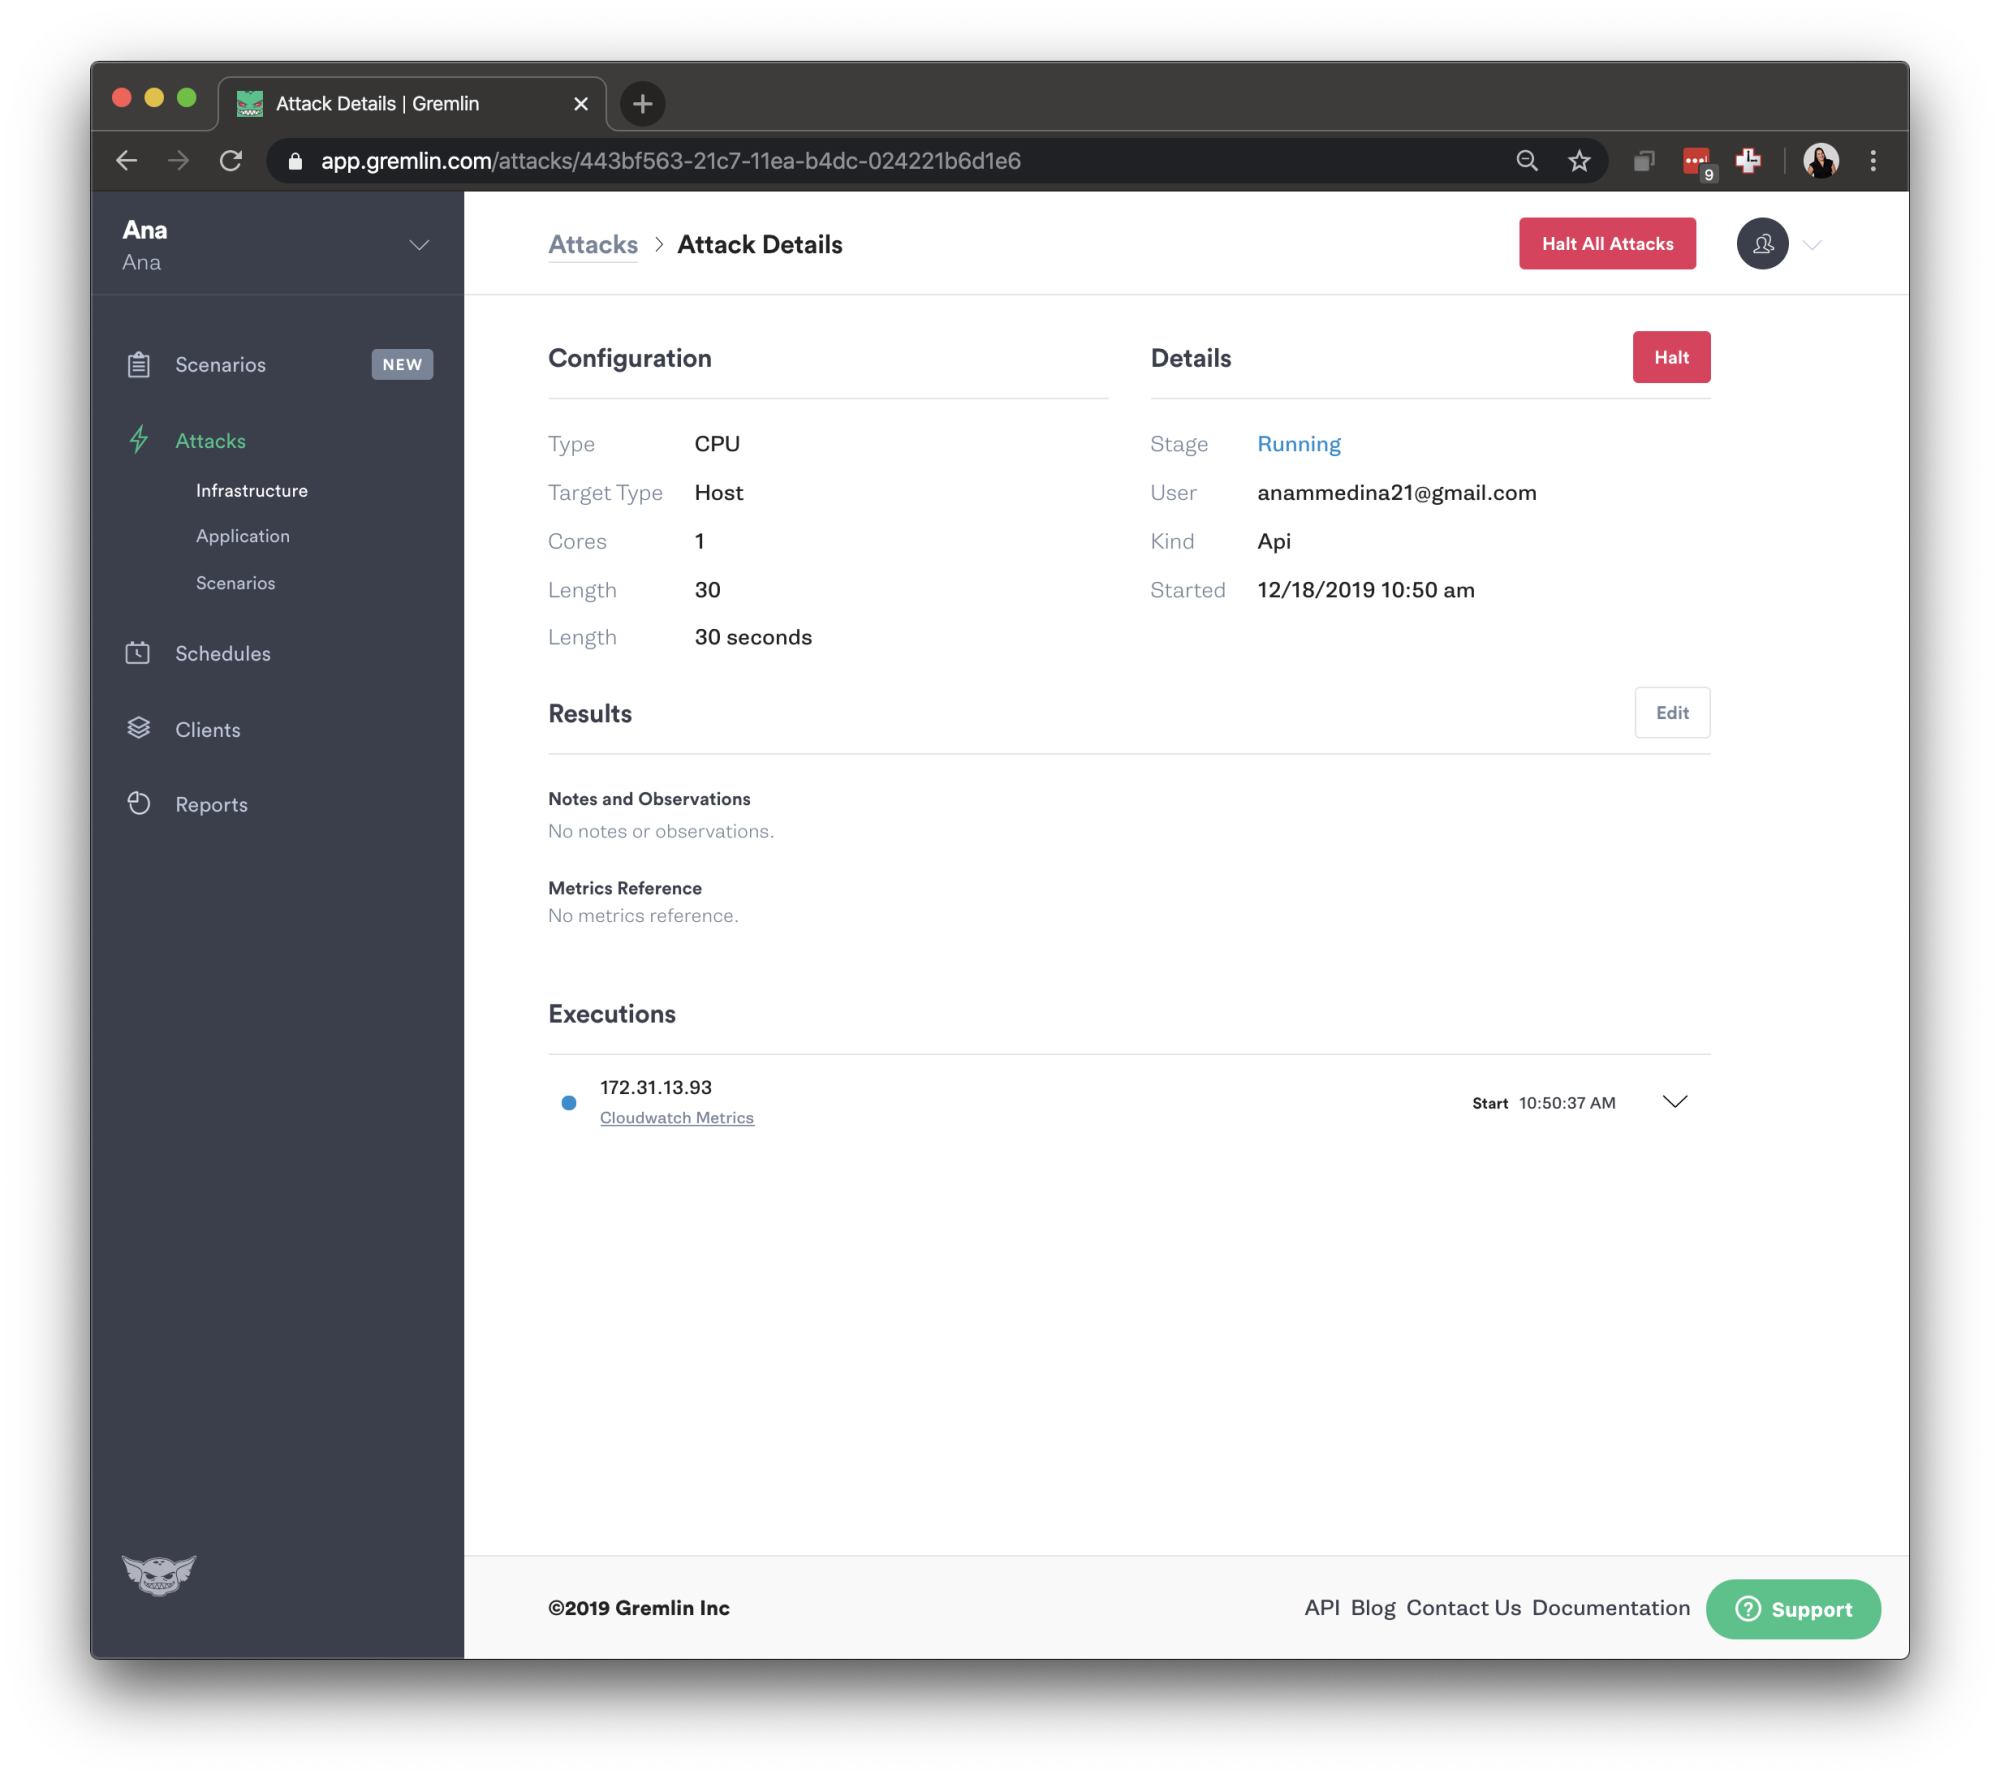
When you select the specific attack you're running, you will be redirected to the attack details page that lets you see you've started this attack from the API
Congrats! You've setup Gremlin and learned to use the Gremlin API. To learn more about what you can do with our Gremlin API, checkout our API reference and API docs. If you have any questions at all or are wondering what else you can do with our API, feel free to DM me on the Chaos Slack: @anamedina (join here!). Good luck exploring!


Gremlin empowers you to proactively root out failure before it causes downtime. See how you can harness chaos to build resilient systems by requesting a demo of Gremlin.
Get started